DIY Tree Stump Table
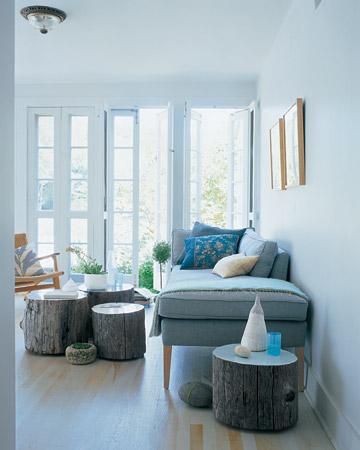
Tree stumps, used individually or clustered together, function as low tables in a living room.
A coat of enamel paint applied to the tops serves a dual purpose: It adds a jolt of color and creates a smooth, sealed surface.
Furniture gliders can be attached to protect the floor.
The wood must be dry for this project to be successful; otherwise, the enamel paint will bubble.
If the wood is damp, let it dry in the sun or in a warm, arid room.
Tools and Materials
Electric sander
Tree stump
Sandpaper in extra-fine, fine, medium, and coarse grades
Wood filler
2 paintbrushes, 1 for primer and 1 for paint
Wood primer
Enamel paint
Hammer
3 to 4 furniture gliders
Tree Table How-To
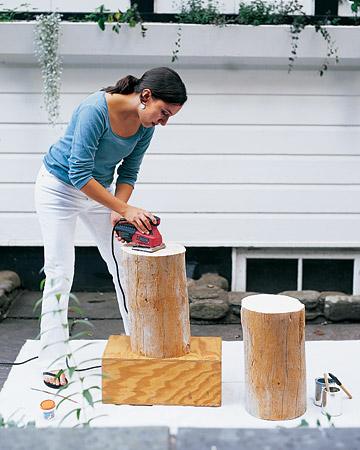
1. Using the electric sander, prepare the surface of the stump.
Sand, changing from coarse to medium to fine paper, until the top is smooth.
2. If there are holes on the surface, use wood filler to conceal them.
Let dry, and then rub the surface lightly by hand with fine sandpaper.
3. With a paintbrush, apply wood primer to top surface, painting from the outside edges inward to keep primer from dripping down sides.
Let dry, then sand lightly by hand with extra-fine paper.
4. With other brush, apply enamel paint to top, again painting from the outside toward center.
Let dry 2 to 3 days.
5. Sand lightly by hand with fine paper. Apply another light coat of enamel.
Let dry for at least 2 days.
6. To create feet, hammer furniture gliders into base.
Martha Stewart Living


 Ελληνικά



Έχω τρεις κορμούς που με περιμένουν στη βεράντα για κάτι παρόμοιο, μένει μόνο να βρω τον χρόνο.
mhjd.com