
 Ελληνικά
This is an easy and super fun kite project for both adults and kids.
Materials You’ll Need:
• 2 wooden dowels, 90cm (35″) and 120cm (47″) long. The longer dowel is the spine of the kite, the shorter dowel the crosspiece.
• Plastic sheeting or recycled garbage bags
• Strong tape, such as packing tape or electrical tape
• Twine
• Kite string
Tools You’ll Need:
• Tape measure
• Scissors
• Pencil
1. Download the printable kite pattern and get your kite building materials together.
2. Measure and locate the middle point on the crosspiece, mark with a pencil. Place the middle point of the crosspiece at right angles on the spine, about 30cm (12″) from one end.

3. Fasten the two dowels together using twine and tape. It is important that they remain at right angles to each other, and the mid point of the crosspiece is directly on the spine.
4. Run twine from one end of the crosspiece, to the top end of the spine, to the other end of the spine. Fasten at each end using tape. This will help keep the dowels properly at right angles to each other. Lay the frame flat, with the crosspiece facing up.

5. Cover the frame with plastic material. Use tape to secure to the dowels and the twine, with extra reinforcement at the ends.

keep going..
6. Punch two small holes along the spine for the bridle. It’s a good idea to reinforce these holes with tape.
7. To make the bridle, feed a length of twine through the hole at the top and tie it to the spine. Do the same with the other end of the twine at the other hole. The bridle should be long enough so when you pick up the kite by it, it’s at least 20cm (8″) from the kite’s surface.
8. Attach the kite string to the bridle. By choosing where you attach the string, you control the angle at which the kite flies. This will require some experimenting to find the best spot, but start at a point near the top of the kite.
9. Attach a length of twine (about 120cm/4′) to the bottom end of the spine as a tail. Tie ribbons of left-over plastic at regular intervals to it.
10. When the time comes for decorating your kite, use all your imagination!
Find some wind and have fun!!


υπέροχο!!! σίγουρα θα τον φτιάξω!! Ελπίζω να έχει αέρα την Καθαρά Δευτέρα!! 🙂
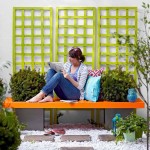
I’m torn between buying a large coffee table and having several
little side tables for lamps etc. Ideas? Maybe this – Luz?